
- Published on
How to Create a Blog and Publish It on This Website
- Authors

- Name
- Bidit Giri
🧠 Introduction
This guide will walk you through how to write your own blog post in MDX format and contribute it to this site. Whether you're documenting a project, sharing your thoughts, or writing a tutorial — you're welcome to submit your article!
🛠️ Step-by-Step Guide
1. Write Your Blog Post in .mdx Format
All blog posts are written using MDX — Markdown with React components support.
Use this structure as a starting point for your front matter:
---
title: 'Your Blog Title'
date: 'YYYY-MM-DD'
summary: 'A short summary of your blog'
tags:
  - tag1
  - tag2
draft: false
thumbnail: '/static/images/blog/thumbnails/your-image.jpg'
authors:
  - default
---
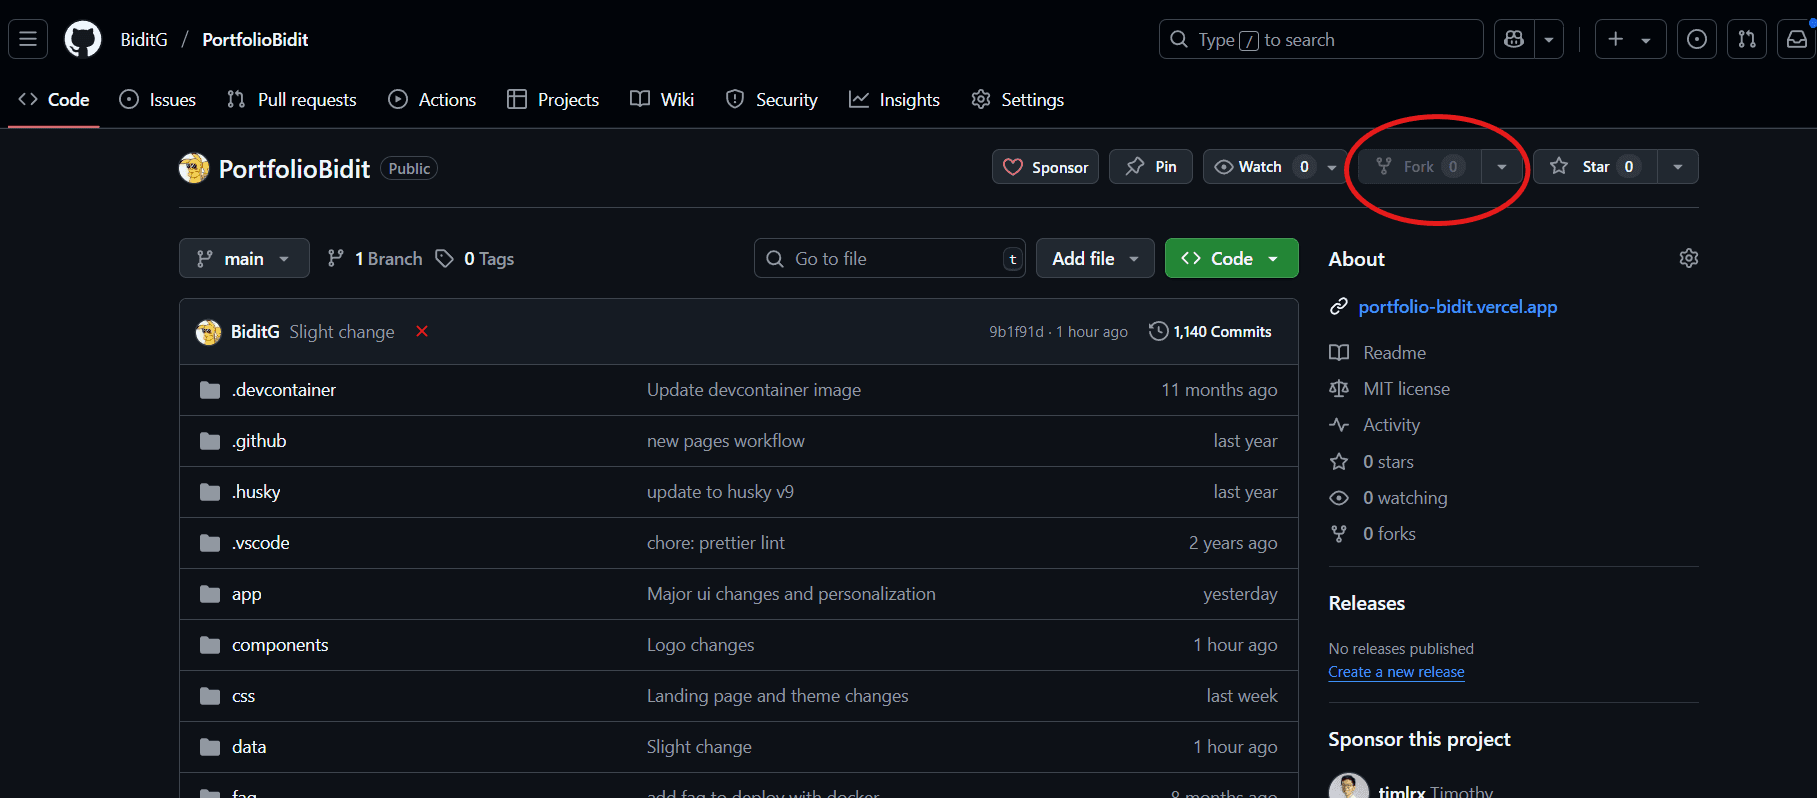
2. Fork the GitHub Repository
Go to the GitHub repo: 👉 https://github.com/BiditG/PortfolioBidit
Click the "Fork" button to make your own copy of the repository.
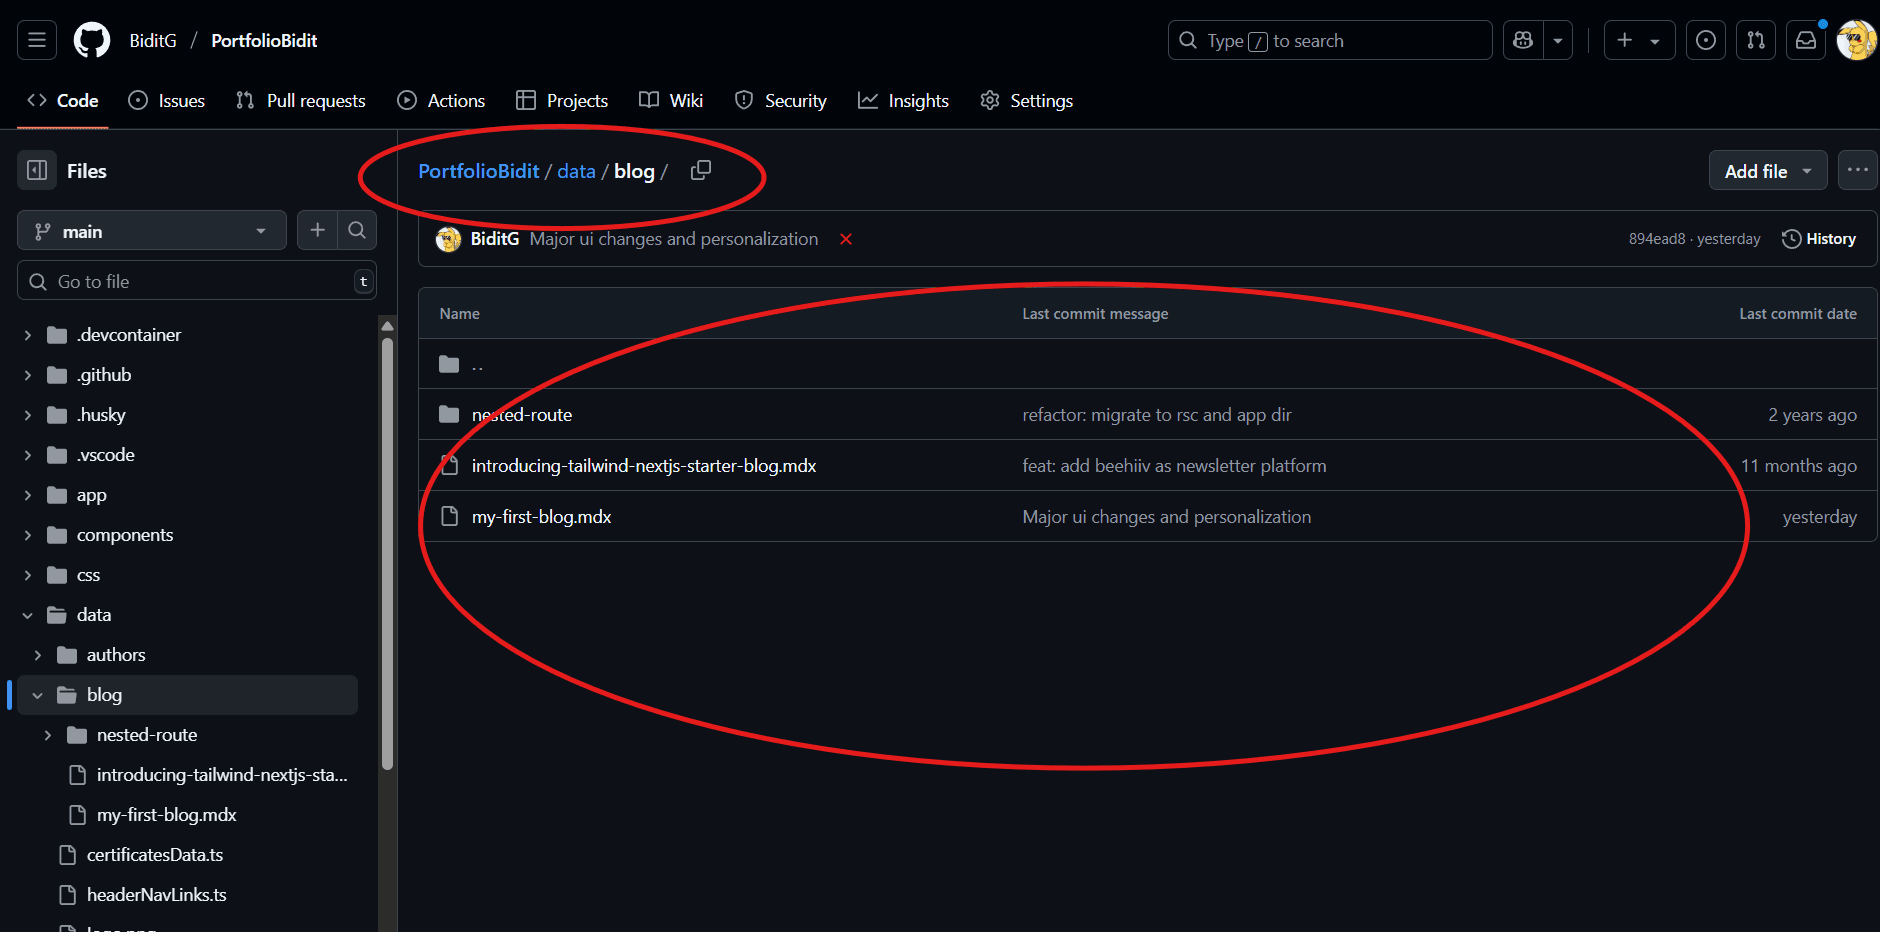
3. Add Your .mdx File
Navigate to the data/blog/ folder in your forked repo.
Create a new .mdx file (e.g., my-awesome-blog.mdx).
Paste your blog post content into it and save the file.
4. Commit and Push Your Changes
After editing, commit your changes with a clear message (e.g., Add my blog post: My Awesome Blog).
Push the changes to your forked GitHub repo.
5. Create a Pull Request
Go back to the original repo: https://github.com/BiditG/PortfolioBidit
Click “Compare & pull request”
Add a short description and submit your PR to the main branch.
✅ Final Notes
Make sure your blog is well-formatted and spell-checked.
Include a suitable thumbnail image (placed in public/static/images/blog/thumbnails/).
If everything looks good, your blog will be reviewed and published!
Thanks for contributing! 💡 If you have any questions, feel free to reach out via GitHub.